Watch the full refinish on YouTube
One of my Instagram followers reached out and told me he had a Kent Coffey Perspecta dresser and was renovating his house so didn’t have the space to keep it. He needed it gone and I came to the rescue!
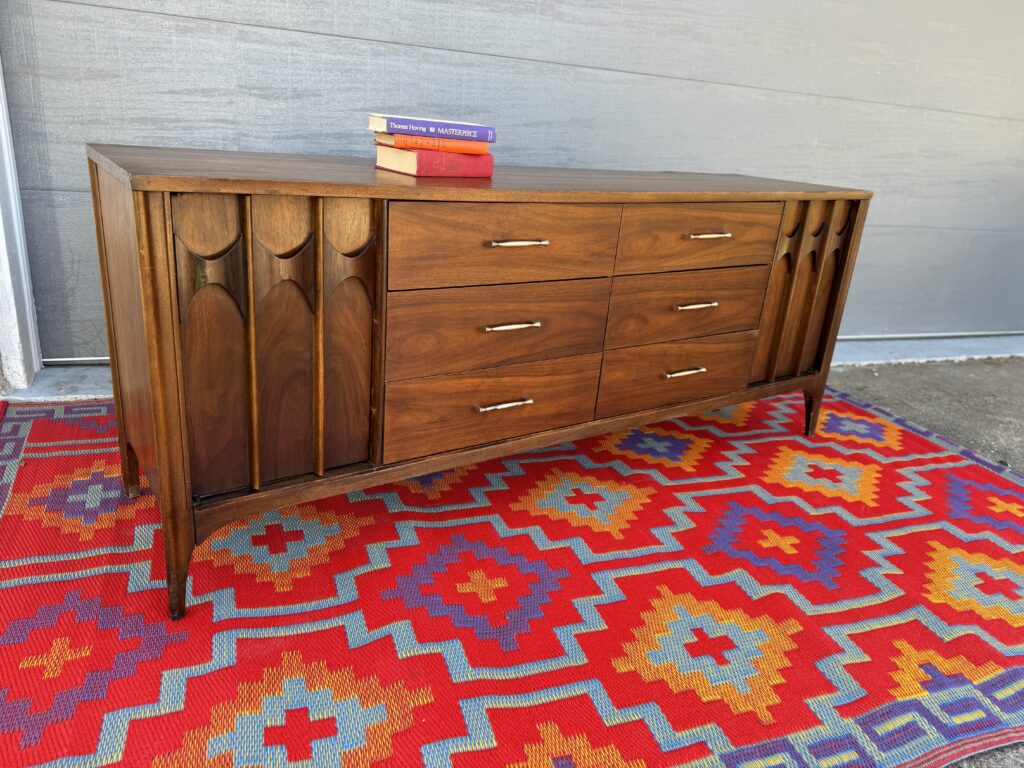
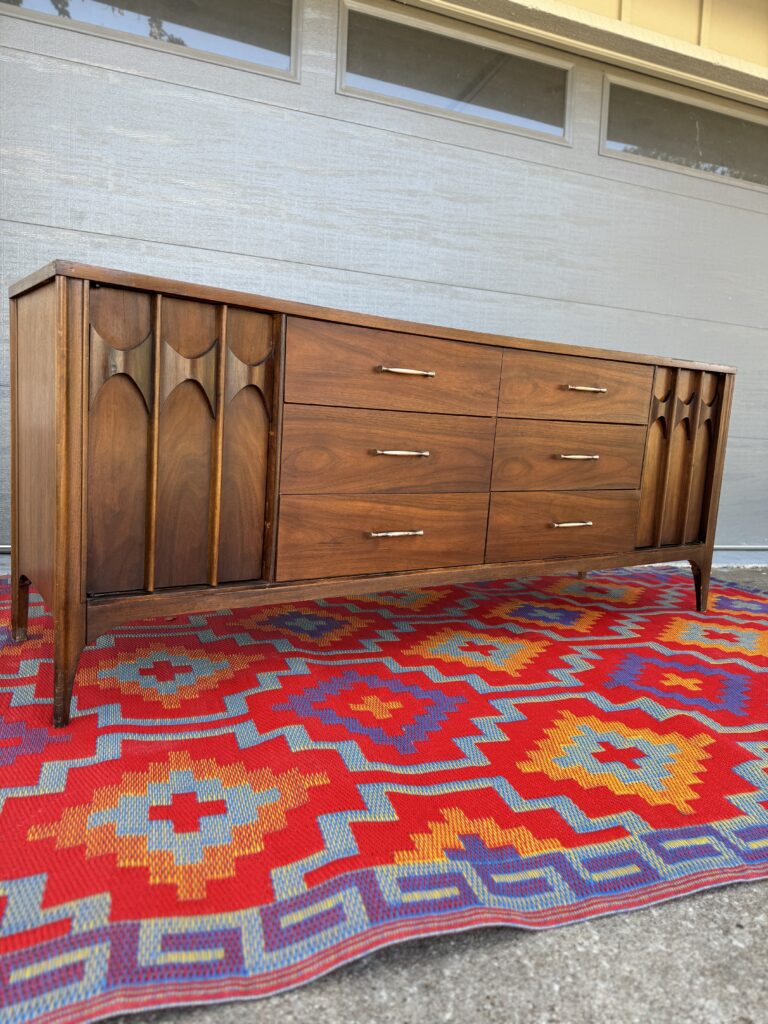
Of course I jumped at the opportunity to pick up the 12 drawer dresser.
The dresser was in fairly good shape except the top surface – which had large wooden chunks missing out of the substrate, missing veneer patches, and a broken door holder.
I set about to refinish this beast and turn her into the beauty that was hiding beneath.
See the full refinish process step by step below;
Step 1 – STRIP
Stripped with Stripwell QCS
** Use Promo Code RPV10 to get 10% off **
Stripwell comes with a spray but I find this wastes too much product so I like to pour it into a glass container and wipe it on with a paint brush.
Let it sit about 10 minutes, work its magic then strip it all off. You will begin to see the lacquer bubbling and pulling away from the surface.
Pro Tip; It’s important to keep stripper wet. If it dries out you can paint another layer of stripper before scraping it off, or cover with plastic wrap to keep it from drying out.
Step 2 – PATCH
Areas of the top surface were raised and uneven. I first had to get wood glue under the area with a skewer, and then clamp it down overnight to get a more even surface top. I then used Mohawk Walnut Epoxy Putty to fill any veneer patches and holes.
Step 3 – SAND
I sanded down the top beginning with 150 grit and worked my way up to 220 for a perfectly smooth sanded surface.
Step 4 – STAIN
I used Mohawk walnut wood wiping stain on raw wood to match the color of the dresser body. You can wipe it on with a soft cloth, stain applicator, or here I used a chip brush. As soon as you have finished applying the stain, wipe off immediately with a lint free cloth.
Step 5 – SEAL
Once the stain has dried I seal with Mohawk EZ Vinyl Sealer. Spray cans are super easy to use. I typically spray 3 coats of EZ Vinyl Sealer.
Veneer Patch and INPAINTING – Front
Here I used Timbermate to fill the small missing veneer patch on the curved arches across the front. It’s best to use this on small areas that aren’t high traffic/touch surfaces as it’s not as structurally strong as epoxy. I pull some out with my finger, roll it around so it ‘activates’ in my fingers, and then wipe it over the surface. Once it has dried completely, you can wipe it flush with a baby wipe or lightly moistened cloth. I then seal with Mohawk EZ Vinyl Sealer and inpaint.
Inpaint any areas where epoxy putty was used also. This is a technique of applying light layers of color to mimic the wood grain pattern and color to match with the body. You can do this in between sealing layers.
For inpainting I love to use a mix of Mohawk’s blendal sticks, grain pens and finish up with toner. Make sure to use multiple layers of color, spraying with EZ Vinyl Sealer or Lacquer in between to make sure the color sticks.
Step 6 – GLAZE
I love glaze because it gets down into the woodgrain and provides depth, and evens out the tone. I use a chip brush or green scrub to wipe it on, let it ‘frost’ over, this usually takes about 20 minutes. The glaze lightens, dries and looks almost like donut frosting. Then, wipe it all off completely with a rag.
Step 7 – LACQUER
The final step in the refinishing process. Spray 3-5 layers of protective lacquer across the top.
Step 8 – OZ CREAM POLISH
I wiped the rest of the dresser surface down with oz cream polish to make it hydrated and fresh again.
FINAL RESULT